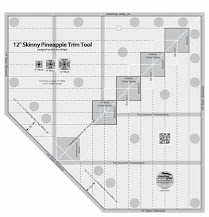
Tomorrow, Wednesday, January 5, Creative Grids will be introducing my new Pineapple Trim Tool. It makes 6", 9", or 12" blocks. The finished strip width is 3/4" instead of 1". I will be watching, so come join me to see how it works.
A live live demo starts on Wednesday, January 5, 1:30 PM Eastern Time. Below is the link for the video.
https://www.facebook.com/Checkerdist/videos/
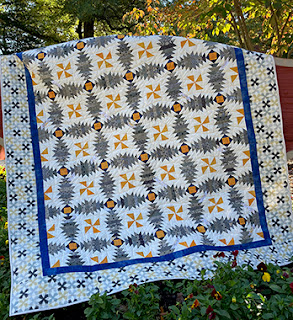
Attached are projects I made using the ruler. Two table runners, two small quilts and 1 twin size quit. It was great fun making the quilts. Some were quick one day projects and others not so quick. All use scraps or precuts such as layer cake squares, fat quarters or 2-1/2" precuts.
 Pineapple Pinwheels
Pineapple Surprise Table Runner
Pineapple Puzzle Wall Quilt
Gumdrops Baby Quilt and Game Time Table Runner